
With the imminent deprecation of the ‘old’ email designer in Dynamics 365 Marketing I’ve had customers asking me how to preserve customizations, e.g. fields they’ve added to the Summary tab, after enabling the new email editor experience.
Lets take a brief look at the differences when it comes to metadata between the old and the new email designer.
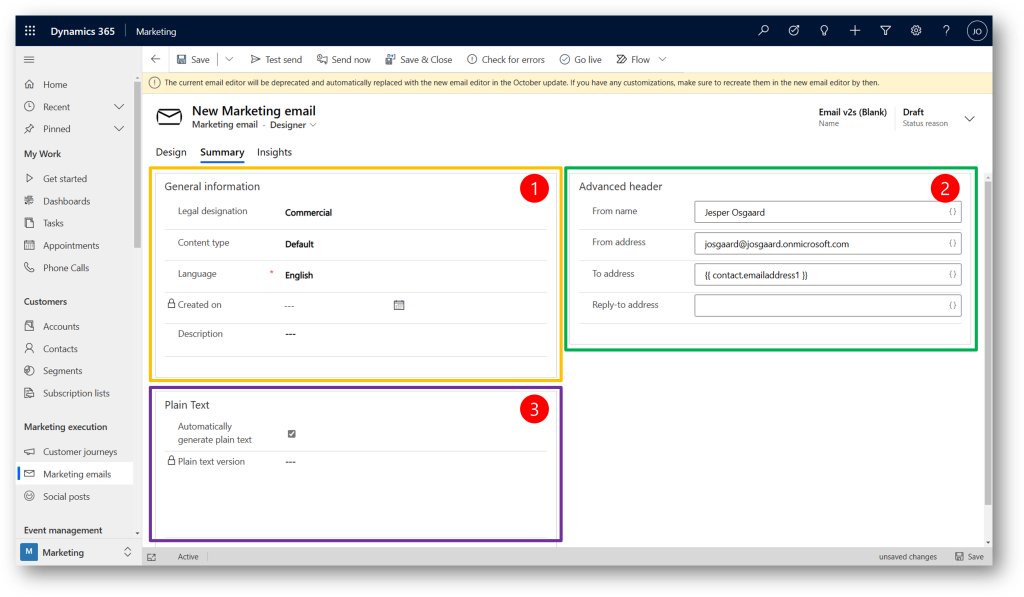
In the old designer metadata like Language sat on the Summary tab
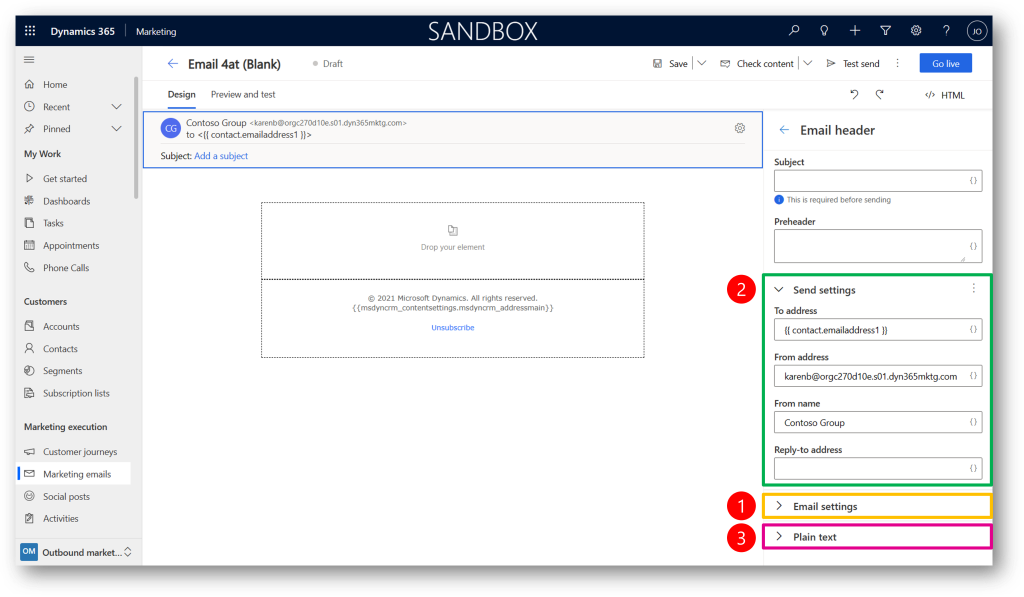
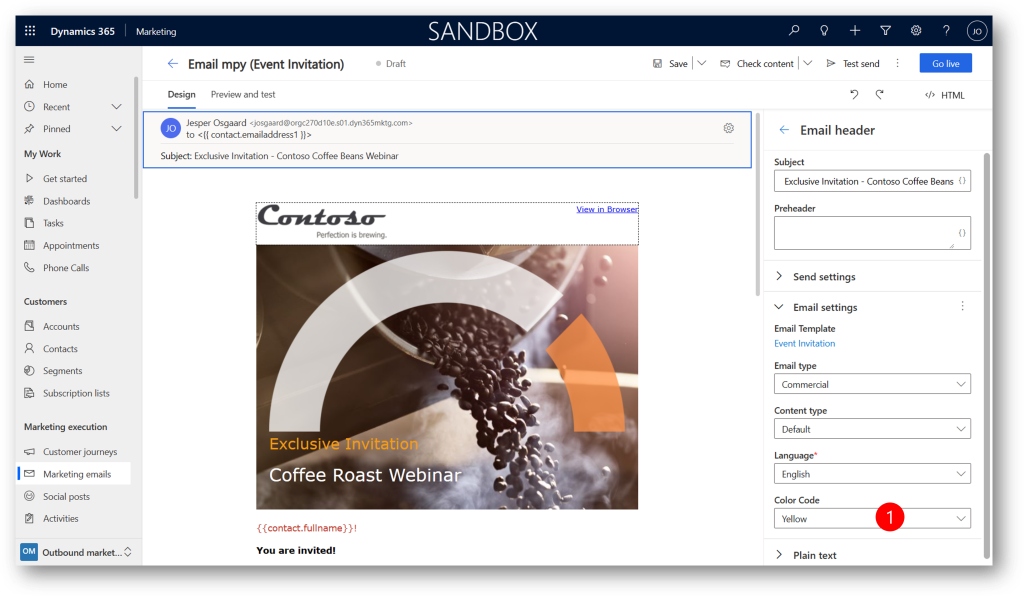
In the new designer metadata sits in a task pane to the right of the screen – which is actually a form we can customize like any other Dynamics 365 CE form
So lets pretend we have customized the old editor – added a drop-down with an option-set to the General information section on the Designer form.
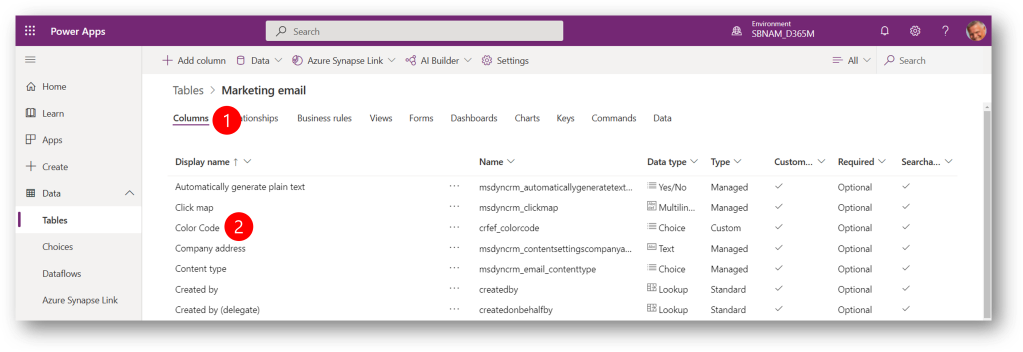
The option-set is called Color Code (holds the values “Red”, “Yellow”, and “Green”. The option-set is bound to a field, also called Color Code.
The field is on the Marketing email entity.
We then flip the switch to start using the new email editor.
Customizing the new forms
The new designer does not leverage the Designer form, but a couple of new forms, which is why we need to do a few edits to bring back the Color Code drop-down to the editor
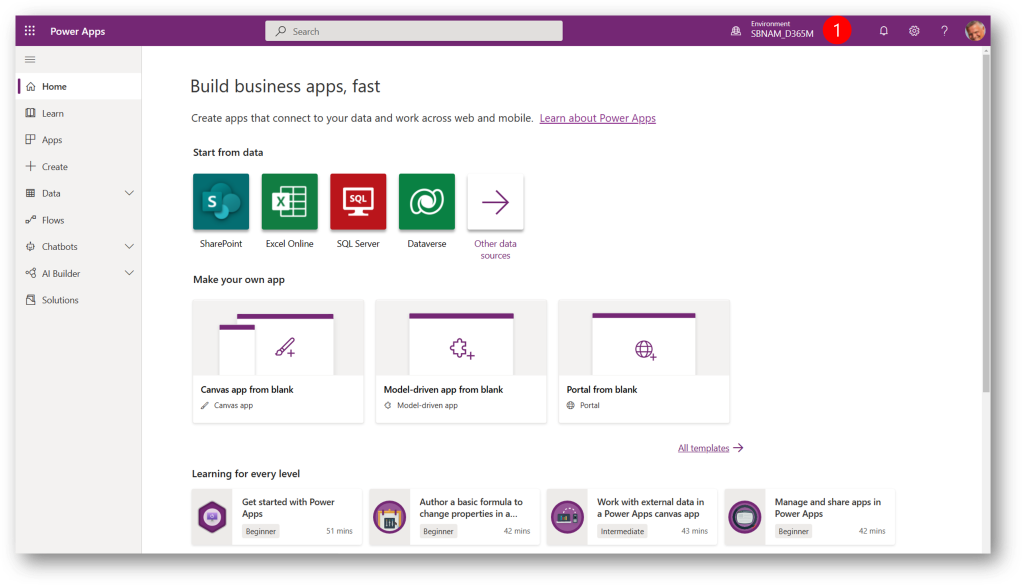
We will leverage Power Apps (make.powerapps.com) to do the necessary edits.
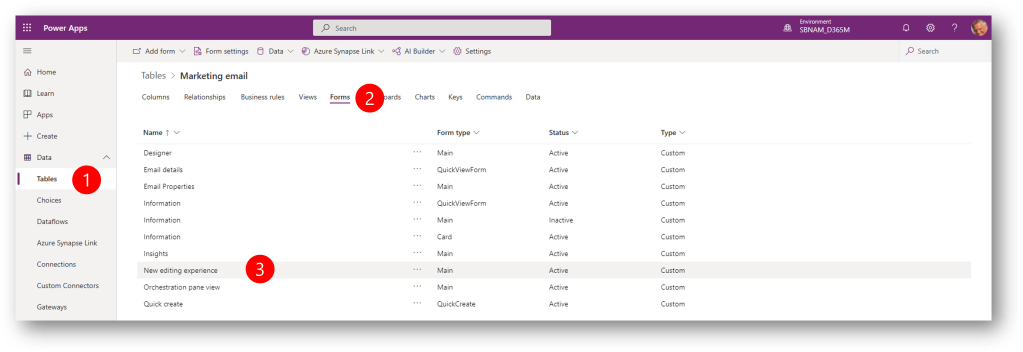
First we must ensure we are in the right environment (1)
Then we navigate to Tables (1) and open the Marketing email table (1)
Note: tables is what we previously referred to as entities
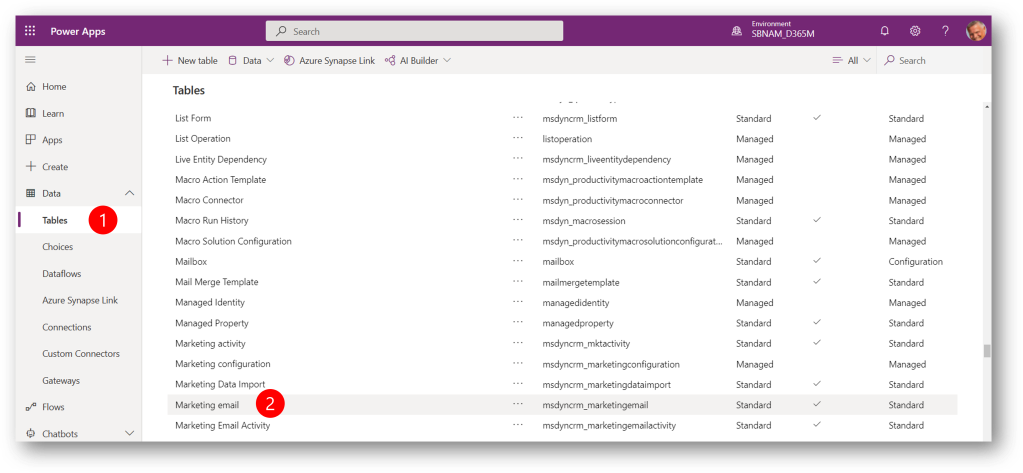
We can easily verify that the Color Code field (column) still sits in the Marketing email entity (table) after upgrading to the new editor. Upgrading to the new editor doesn’t change the schema.
What we have to do to surface the Color Code drop-down in the new editor, is to edit two forms; add the field to them both (yes – it’s required for now), and hide the field on one of the forms.
So let’s get started
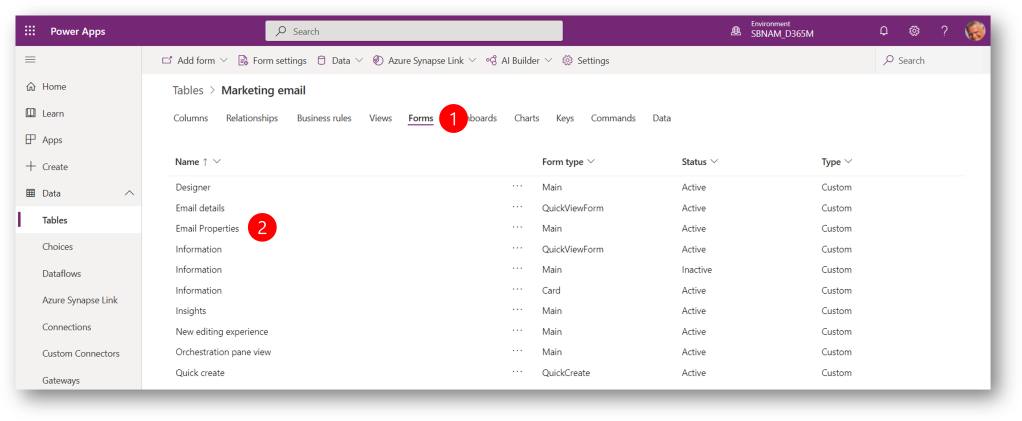
Still in the Tables view, click Forms (1) and then Email properties (2) to open the Email properties form in design view
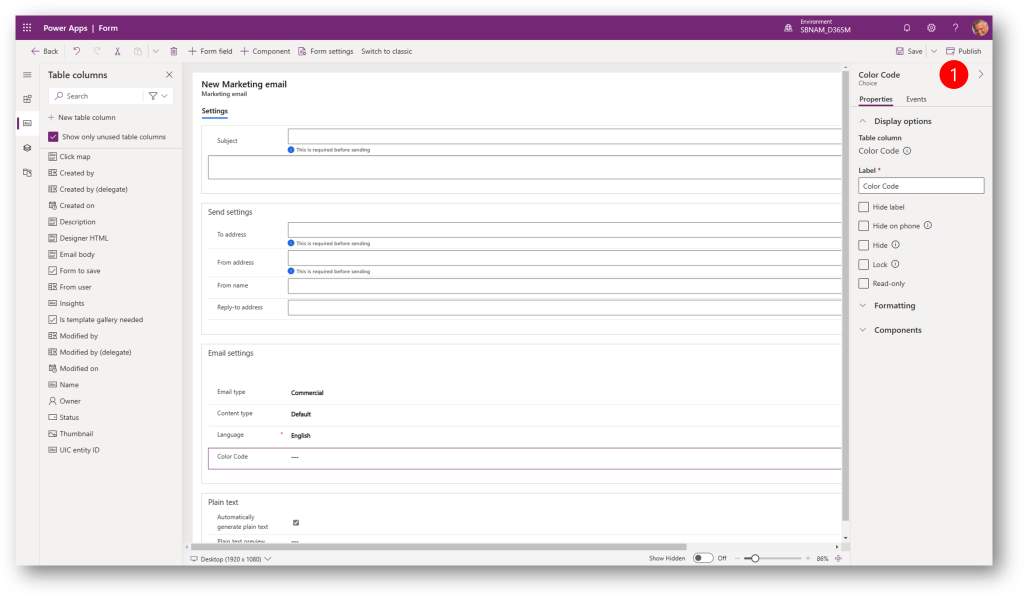
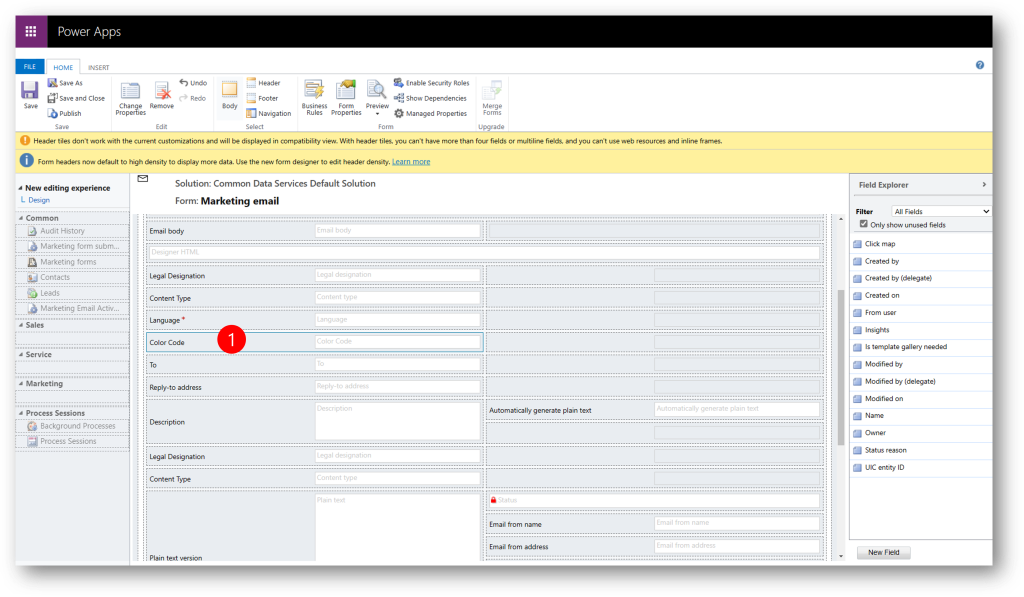
In the form designer click Table columns (1) to display the entity’s fields, and then drag the Color Code field (2) on to the form underneath the Language field (3)
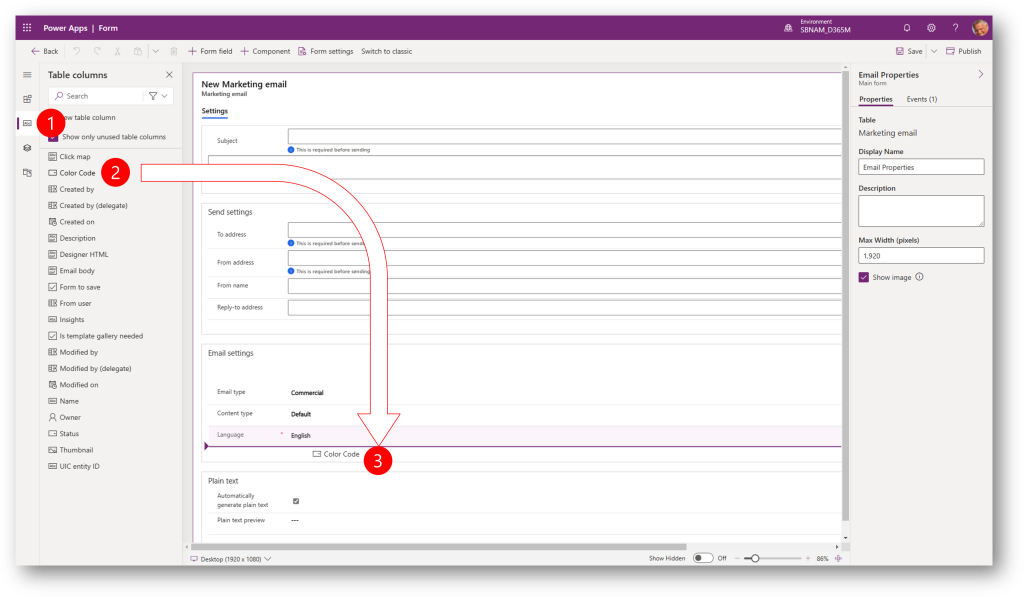
Save and Publish the form
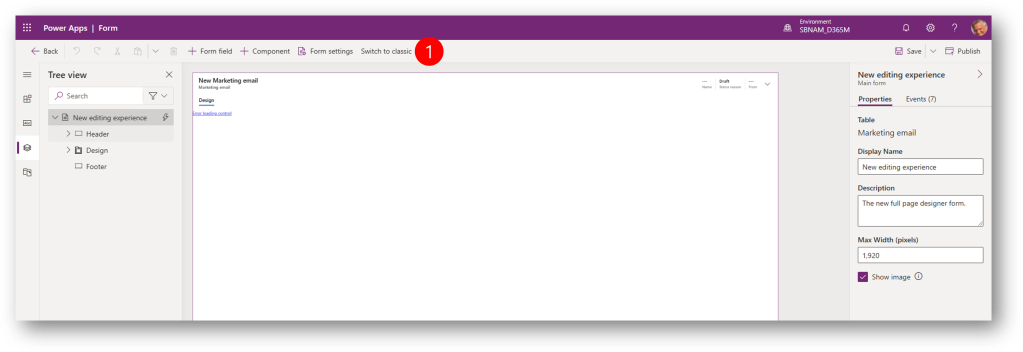
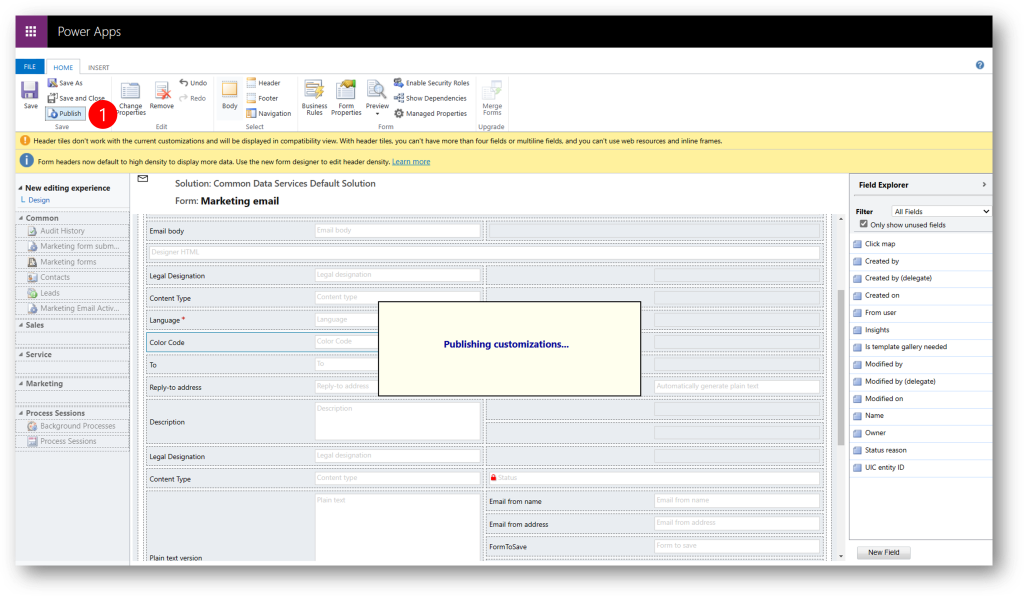
Navigate back to the Power Apps Tables view (1), click Forms (2) and then New editing experience (3) to open the New editing experience form in design view
We can not use the Power Apps form designer for the next step (there is a temporary bug with displaying the design control)
Click Switch to classic (1) to open the classic forms designer
In the classic form designer drag the Color Code field (1) from the Field Explorer on to the form underneath the Language field (2). It’s not important where we place the field EXCEPT in front of the first control on the form – that will break the experience!

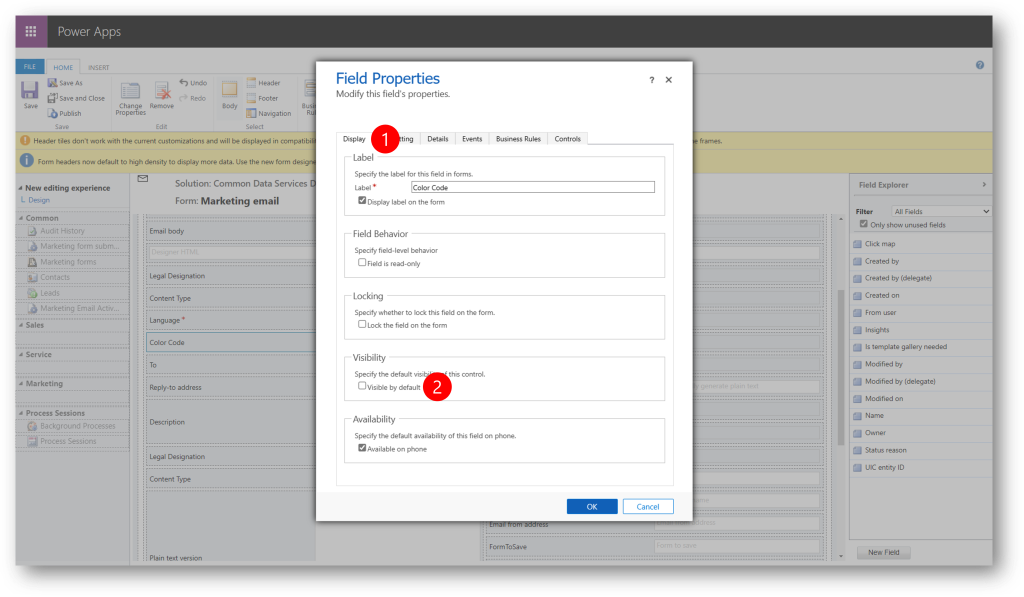
All controls we add to the New editing experience form (by dragging fields onto the form canvas) needs to be hidden. Double click the Color Code control (1) to open the Field Properties dialog
In the Field Properties dialog navigate to the Display tab (1) and uncheck the Visible by default check box, and then click OK to close the dialog
Save and Publish
The new Color Code drop-down is surfacing under the Language drop-down as expected, and we can now add the color code metadata to our emails going forward
That’s it. Just add existing fields to two new forms.
See also
- Customize the email designer – link
